Installation & Setup
Installing and setting up your Vinoshipper Injector on WordPress.
Already have Vinoshipper Injector Installed?If you included Vinoshipper Injector before using our plugin, you will need to remove the JavaScript code before activating the plugin.
See Transitioning from Previous Versions for advice on removing previous Vinoshipper JavaScript code. Then come back to this page to install via the Vinoshipper Plugin.
Installation
Via WordPress Admin -> Plugins
The easiest path to install the Vinoshipper plugin is to use your website's dashboard. This methods enabled automatic updates, allowing your system to always have the latest version of the plugin automatically.
- Login to your Wordpress Dashboard with an admin account.
- The URL is normally:
https://example.com/wp-admin/, replacingexample.comwith your domain name.
- The URL is normally:
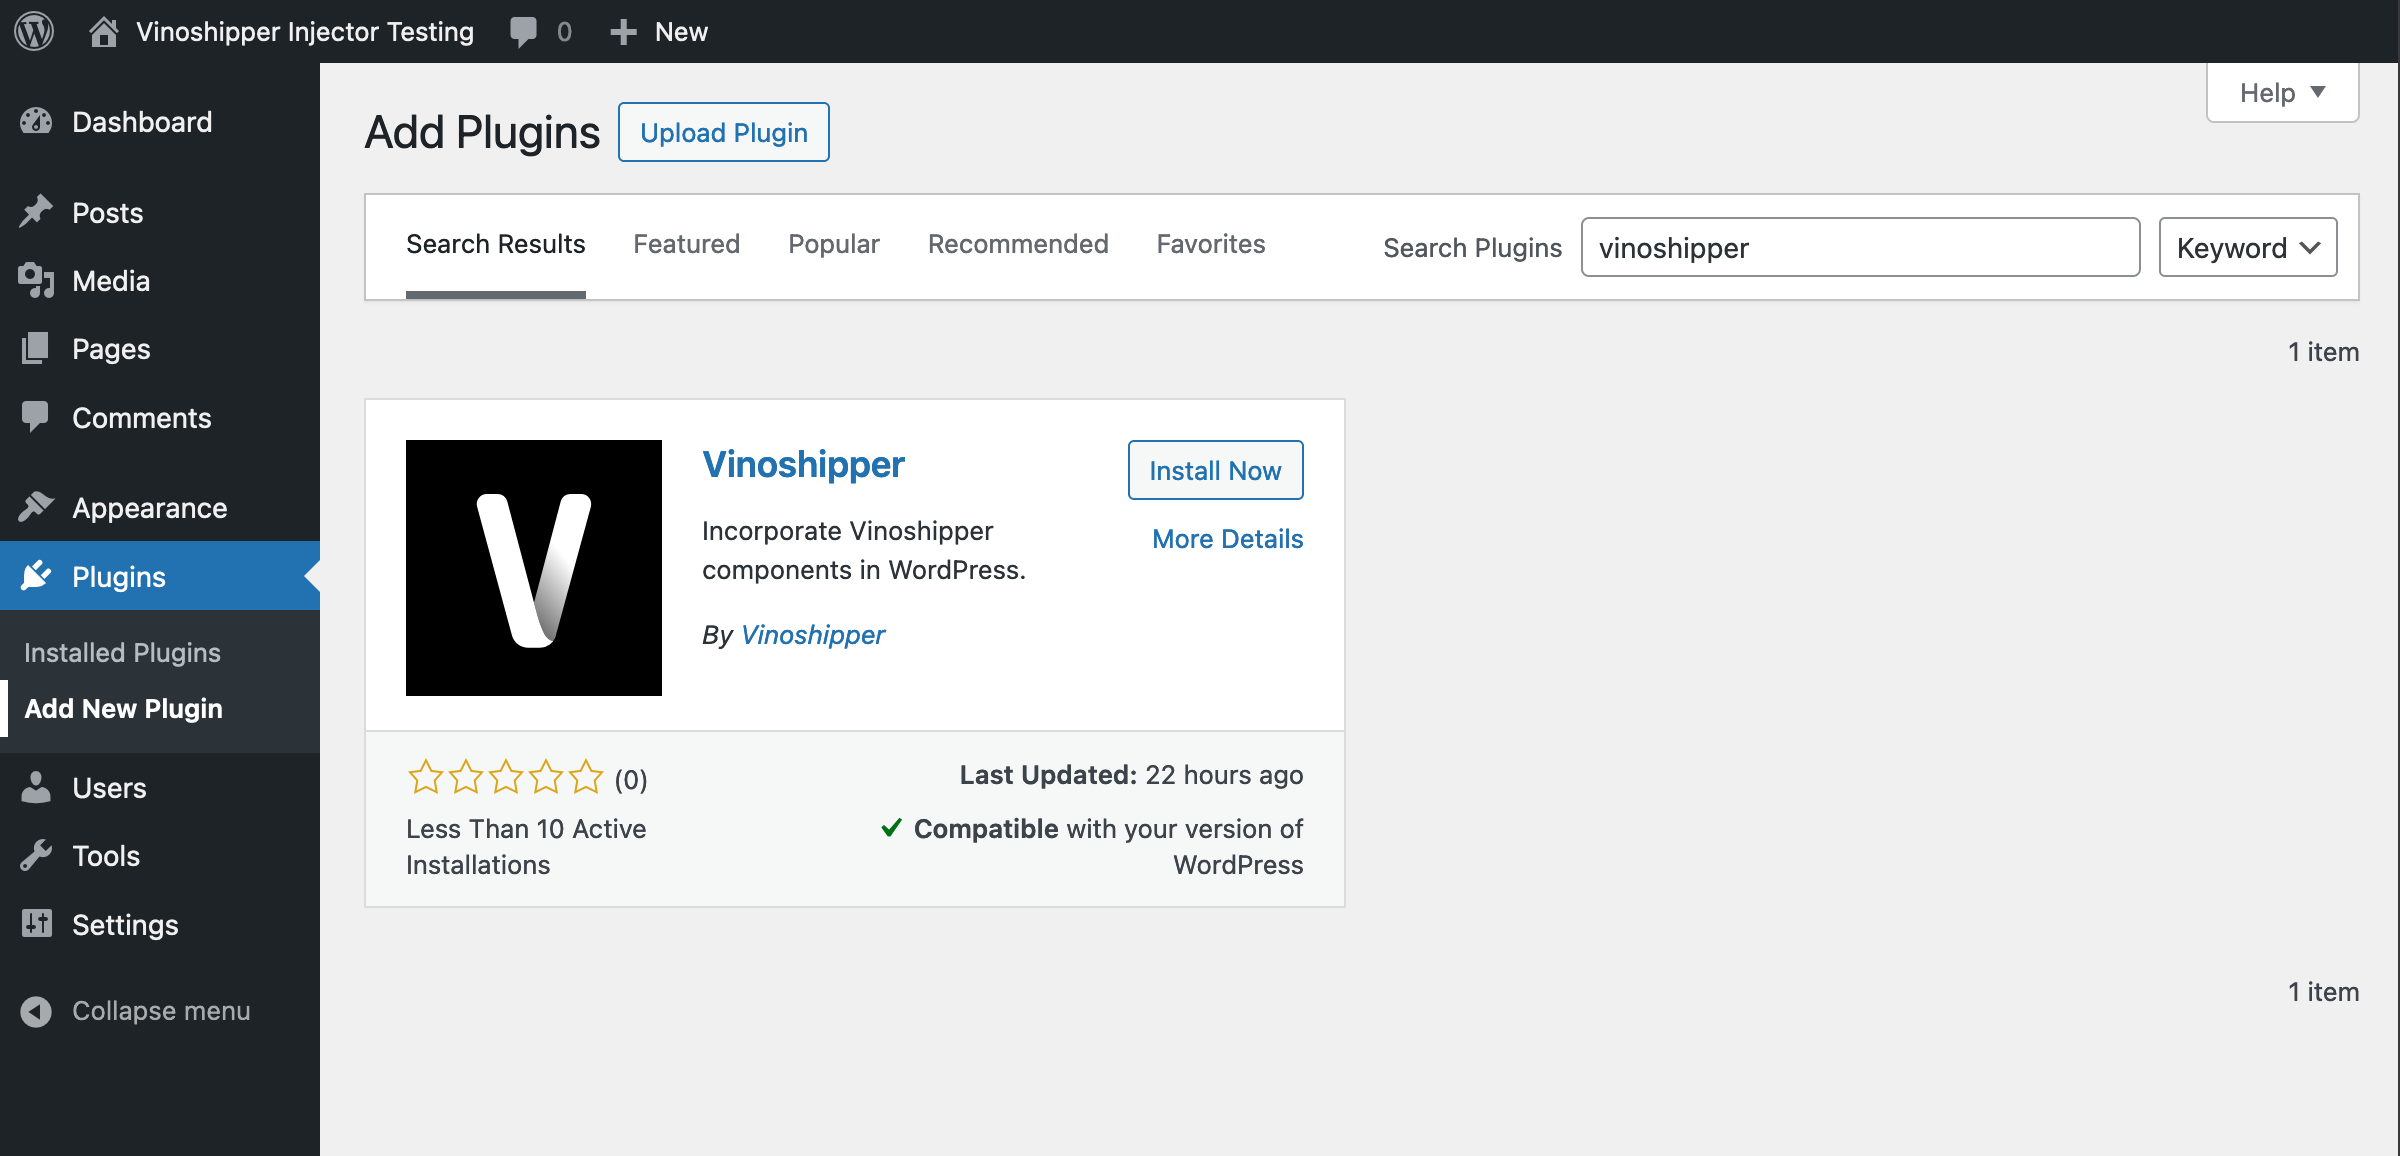
- Click "Plugins" on the left navigation bar.
- Click the "Add New Plugin" button.
- Search for "Vinoshipper".
- Find the "Vinoshipper" plugin, created By Vinoshipper, and click the "Install Now" button.
- Once successfully installed, click the "Activate" button.
- Proceed to the Setup section.
Setup
Account Settings AccessAdmin options require a "Manage Options" credential (typically Admin or Super Admin user level) to your WordPress user account. Usually the same WordPress account that can install plugins can also access these setup settings.
You should see the "Vinoshipper" link on the left sidebar when logged into your WordPress Dashboard, highlighted in the screenshot below. If not, check to make sure your plugin is installed and activated.

Account Settings
- Enter your Account ID field title "Vinoshipper Account ID".
- The screenshot above shows "0000" as a placeholder. Your producer ID should be filled into this field.
- Check your "Theme Settings"
- By default the Injector will use the "Blue" theme.
- You can select a different simple theme by selecting the color you wish.
- If your website's color scheme is darker, you can switch the dark mode for the selected theme.
- Click "Save Settings"
You are now set to start using Vinoshipper Injector!
Theme Settings
We offer a number of different themes to easily set the color of all elements. Choose the color you prefer and hit "Save Settings".
If your theme is darker, select the "Enable Dark Mode" option for better readability.
If you are developing your own advanced theming for Injector, select the default for best results.
Cart Options
Cart Position
By default, the cart pop-up will be on the "end" (right) side of the browser window. You can select "start" (left) to switch to the left.
Display Cart Button
Allows you to disable the cart button, if you will implement your own cart button.
Updated 12 months ago